The 5 Most Common Sublimation Problems
With any form of decoration there are challenges that must be overcome, it’s simply a natural part of the learning process. You didn’t jump in the driver’s seat of a car and instantly start driving. It took training, time, patience and probably a lot of close calls before you became proficient behind the wheel. (And with today’s congested roads, those challenges never really go away, no matter how much experience you have…) Thus the same can be said about decoration production, you learn with experience, but thankfully the challenges aren’t nearly as difficult as learning how to drive a car.
In the case of sublimation there are five common problems you will probably encounter along the road to success. Each can be avoided with the right understanding and approach, but inevitably you will probably end up meeting each one face-to-face at some point. They say you learn far more from your mistakes than your successes.
1. Banding

If you encounter lines of missing ink in your printouts, then you are most having banding issues, the most common cause of which is clogged print head nozzles. Like it or not, ink dries out over time, all ink, not just sublimation ink. If this happens inside the print heads, then obviously the flow of ink will be inhibited, which results in streaks of missing ink on the printout – welcome to BANDING.
As long as you are printing on a regular basis – at least several times per week – the ink will not have an opportunity to dry out. But for long stretches of time with no printer activity, you could have issues.
The simplest way to deal with this is to run a small quantity of ink through the heads on a routine basis, by using the head cleaning function of your printer. In the case of Sawgrass and Ricoh printers, this is done for you automatically, as long as you leave the printer powered up. However, for Epson printers you will need to perform a manual head cleaning every few days, which means pushing a button.
For those of you who have a short term memory, there are some software programs available that will prompt your printer to perform a head cleaning at specified intervals. You set it up and it does the work as long as you leave everything powered up!
Banding has some other causes besides just clogged heads, such as running out of ink. Before you start going crazy with troubleshooting, make sure you still have plenty of ink in your system.
2. Moisture Issues

The introduction of moisture into the sublimation process can cause unwanted results. During production with a heat press operating at 400 degrees, that moisture can flash to steam and literally blow away the ink from its intended target. Some of the problems that are attributed to moisture include: color shifting (colors lose accuracy), bleeding of the image, and uneven transfer of solid filled areas.
Under normal circumstances, a small amount of moisture can accumulate in your transfer paper and it’s usually absorbed directly into the substrate during pressing. However, hard substrates like metal and ceramic are unable to absorb excess moisture. Thus, it’s important that you take steps to minimize the introduction of moisture into the process.
The first step is to protect the paper from moisture absorption. As a preventative measure, you should store your paper in dry place. Avoid using Zip-Top plastic bags as they can actually trap moisture within.
If you suspect moisture, set the paper on your press for a few seconds. Do not press it. Just expose it to the warmth. The heat radiating from the press should help evaporate most of the moisture.
Another trick is to use newsprint or butcher paper instead of a Teflon sheet. The paper will help absorb moisture from the transfer sheet during pressing (Teflon will not). Be sure to use a fresh sheet of paper on each pressing.
If you are working with garments or fabric, it’s also possible that the substrate may contain a bit of moisture. Pre-pressing the garment for about 3 seconds, should remove the moisture and any wrinkles as well. Do not overheat the substrate! Applying a sublimated transfer to a hot surface will start the gassing process prematurely, which may lead to ghosting.
In addition, you should focus on your work environment. If there is a high level of humidity present, it may be contributing to the moisture issues. A de-humidifier may be necessary to help control humidity issues. However, reducing it too much can have negative effects on the inks and your equipment. Thus, you should invest in a hygrometer and take some readings. The ideal operating conditions for sublimation are 70o – 80o F with 35% - 65% relative humidity (no condensation).
3. Ghosting & Gassing Out

Sublimation requires a tight marriage between the transfer paper and the blank product during pressing. If the paper shifts or is not firmly planted against the substrate, then the result will be ghosting and/or gassing out.
Ghosting is when you end up with a blurry image, typically characterized by a shadow effect along or outside of the edges. Gassing Out is when you end up with a “burst” of ink outside of the image area.
The key here is a tight fit between the transfer paper and the substrate. It’s a good practice to use heat resistant tape to secure the transfer to the product. Use care not to tape across the image area as this can often damage the image quality. In addition, use only a minimal amount of tape, as you will need to be able to easily and quickly remove the transfer after pressing.
When sublimating apparel, you can use “repositionable” spray adhesive instead of tape. Apply a very light mist on the image side of the transfer paper from about 12-18" away. Do not spray the shirt. Then press the transfer paper to the product. If you position it incorrectly, you can lift it off and reposition it.
Regardless of how you adhere the transfer paper to the product, it’s important that when you remove it, it doesn’t slide along the surface of the substrate, as this may spread sublimation dye into unwanted areas, and cause ghosting. Ideally, with hard substrates, the transfer will be lifted off the surface, quickly and cleanly. With apparel, it may work better to grab one end of the paper and pull it away slowly, while firmly holding the garment down.
If your teflon blowout sheet becomes stained or dirty, it can also cause ghosting. You may want to consider using newsprint or butcher paper instead of teflon. Be sure to use a fresh sheet on every pressing cycle.
4. Output Colors Are Incorrect

Rule Of Thumb – Output color is correct, it’s the input color that’s wrong.
The problem of color mis-match is not usually the result of a defective system, rather it comes from the fact that there are multiple pieces of image rendering equipment involved in the process, each having different methods and ranges of color management.
First and foremost, the computer monitor is displaying in RGB mode while the printer is printing in CMYK mode. And with sublimation, what comes out of the printer is not the final color as it will shift again during the pressing. It’s kind of like translating French to English to Spanish, you can get the general message across, but rarely is there a direct word-to-word match-up.
It should be noted that a computer screen makes its own interpretation of color, thus what is displayed is probably not the correct color, so spending a lot of time trying to match the output of the printer to what is displayed on the monitor is probably a waste of time. It’s far more accurate to generate proofs for the customer to review and making sure that the correct color management settings are being applied to ensure color accuracy for the final product.
If you have purchased a Sawgrass system, you have been provided (free) color management tools. For the Ricoh Printers and certain Epson models, and you are using a PC, you should have downloaded and installed PowerDriver. This includes the printer driver, a color management driver and color-matching tools. If used correctly, the PowerDriver will help ensure that the proper colors are printed each and every time. If you are using a MAC platform, the tools are a little bit different. You will download and install a printer driver, then use the MAC Profiles for color matching.
For those using the Creative Studio system (PC or MAC) you will download and install the Creative Studio Print And Color Manager which has many of the same functions as PowerDriver.
With any device that displays or prints color, there is a limit as to the range of color that can be handled, something referred to as gamut. RGB devices (such as monitors) have a larger gamut than do inks and printers. Thus, there may be colors that can be created on a computer that are outside of the range of the printing system.
Popular graphics programs such as CorelDRAW and PhotoShop, come with a wide assortment of color palettes for creating graphics. However, those systems do not understand the range of color that you can print with your CMYK sublimation system (or any system for that matter).
Many Sawgrass color management systems such as PowerDriver provide color palettes that can be uploaded into these graphics programs. They are specific to the printing capabilities of the ink and printer you are using. This will help improve the imaging process as you will be working from a set of color values that are sublimation friendly rather than just random.
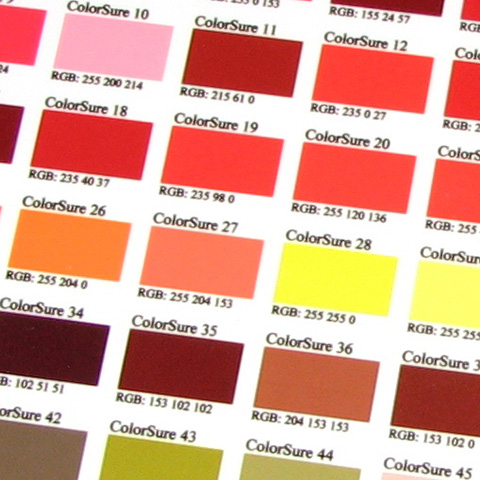
With PowerDriver you can also create reference charts that correlate the final production colors to what you see on the screen. To do this, simply print the color palette that is used by your sublimation printer driver (it includes the RGB codes). Then press it onto a reference substrate such as a coated metal panel. This becomes a visual representation of what the colors will look like in their final form.
Select the colors for your design based on this chart (the output), rather than relying on the screen colors (the input). It may not look correct on the screen, but you will know what it will look like when it comes off the press.
For more advanced color management you might want to invest in a RIP program which provides very precise tools for managing color and controlling production. To learn more about color management options visit: Sawgrass Inc. Software
5. Transfer Lines On Apparel

Transfer lines are where you end up with a faint line in the fabric that corresponds to where the edges of the transfer sheet were located during pressing. They are caused by the shirt fibers melting along the edges of the transfer sheet. If you are an Embroiderer, transfer lines look kind of like hoop marks, except they are permanent!
Your first option for preventing transfer lines on apparel is to experiment with your heat press settings. Consider dropping the temperature down to 385oF and reducing the pressure to a very light setting. You might also cut back the pressing time from 60 seconds to about 35 seconds. Changes should be made gradually, as too much variance from the standard settings could affect image quality.
Many Sublimators use a process that utilizes a sheet of high temperature foam during production to prevent lines from forming. Vapor Apparel produces a turn-key kit complete with instructions and a YouTube video to explain the process. It can be purchased from any of their Distributors.
Teflon pillows are another tool that has been developed for apparel sublimation. Check with your equipment suppliers for more information.
One important thing to remember with apparel, is that different garments may need different settings. Regardless of which approach you use, be sure to document your settings for future reference.
These are some of the most common issues encountered by Sublimators, and each of them is relatively easy to resolve. If you are still having trouble, then make sure you contact your equipment supplier to discuss. Don’t let production challenges slow you down or intimidate you. Most issues can be resolved over the phone! But first you have to make the call